At-Home-Clay Project Kit
NOW ONLY: $48.00 +tax
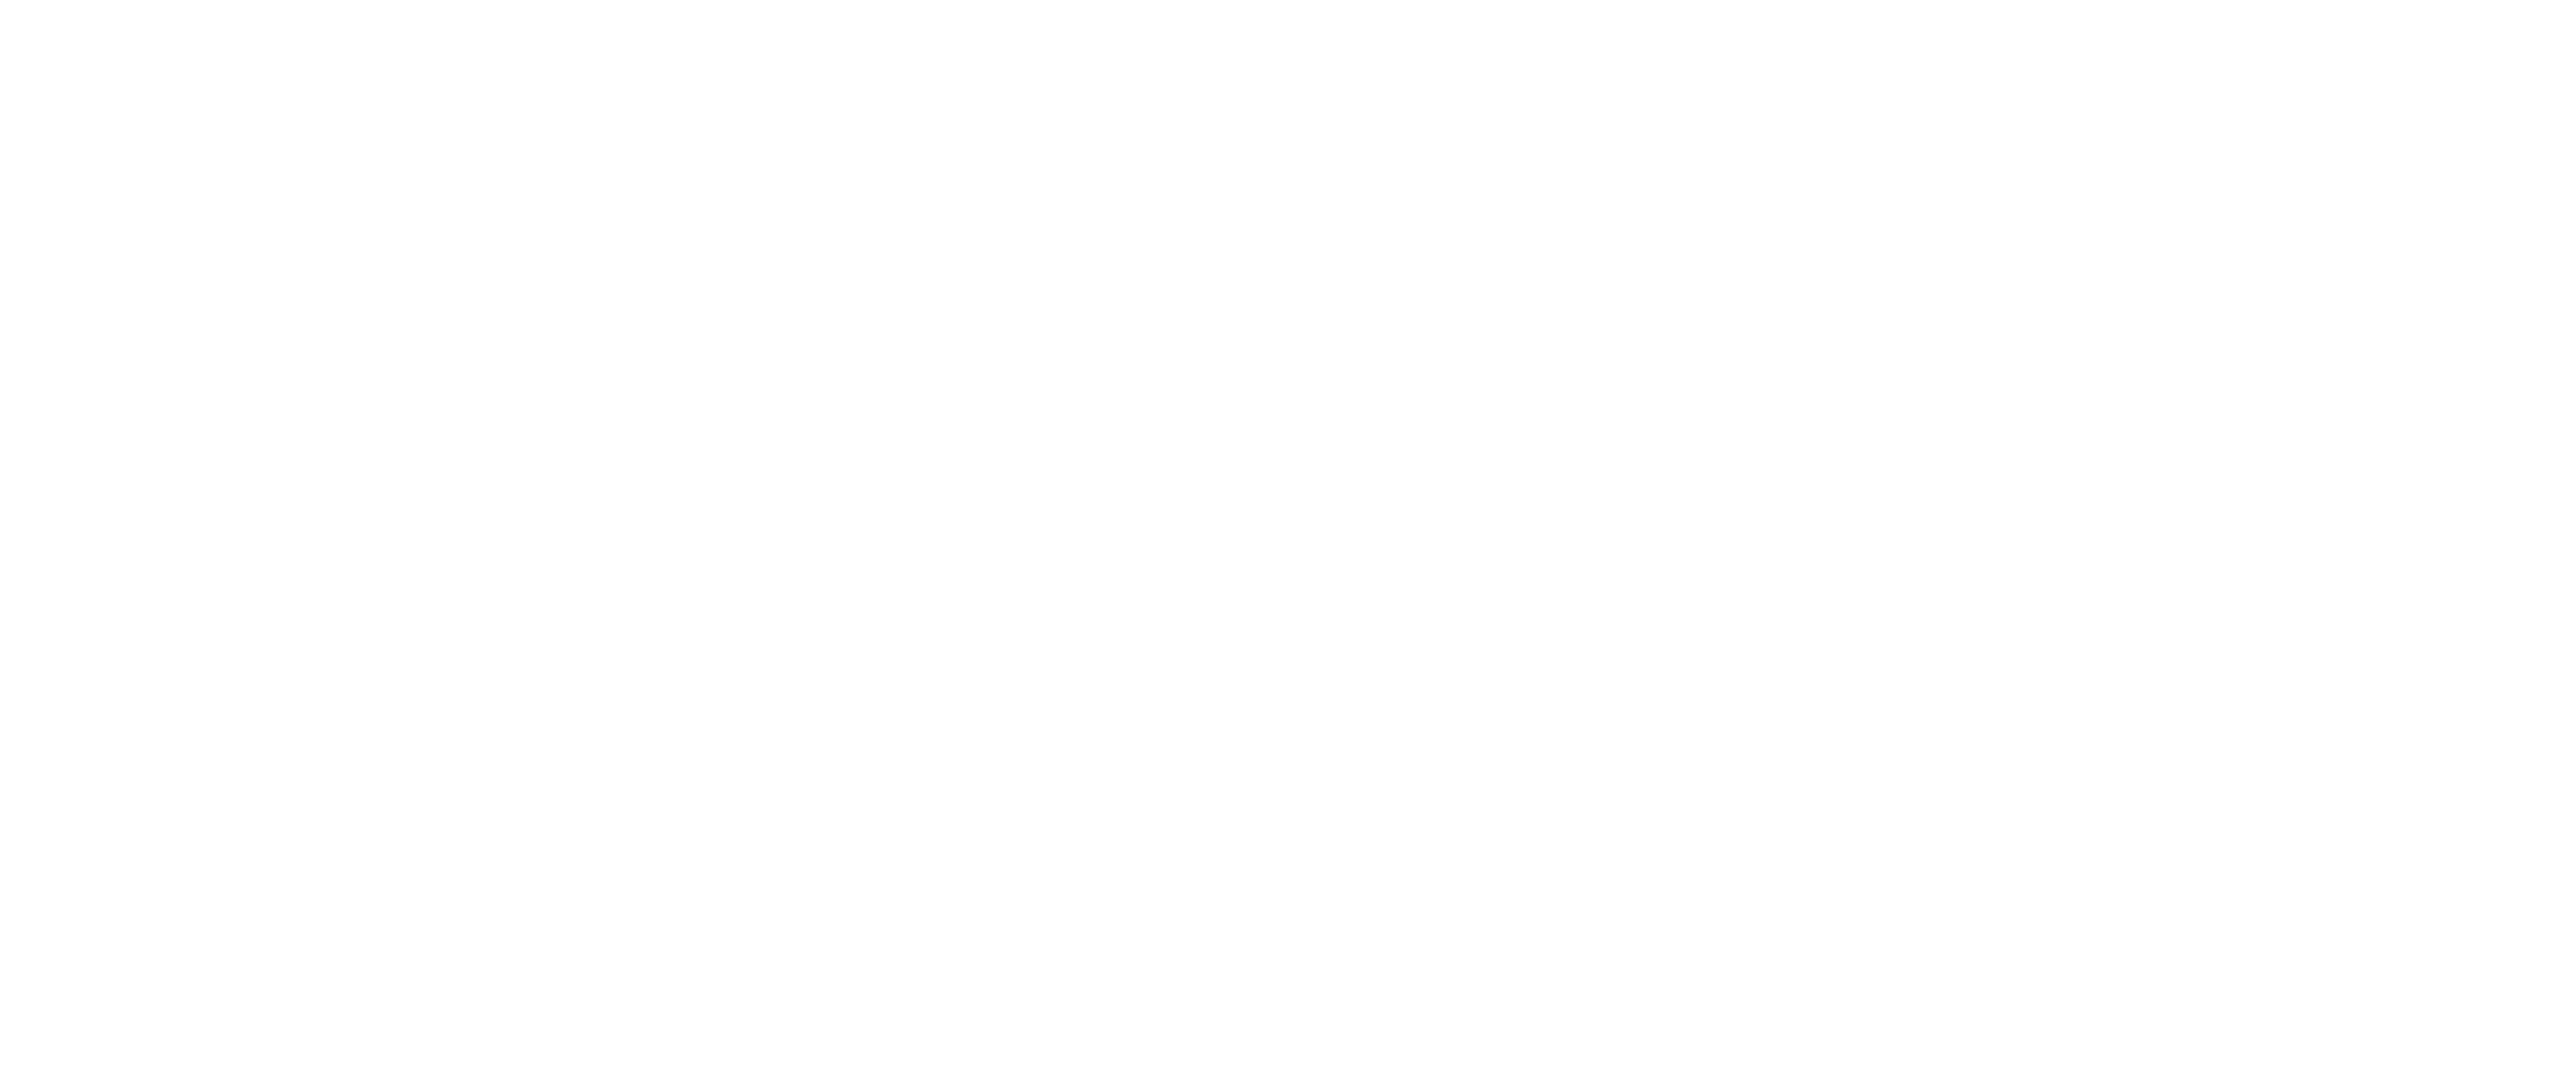
Kit Includes: Five pound clay, ovoid shaping tool, circle sponge, wooden tools, instructions, and kiln firing.
At-Home-Clay Project Kit INSTRUCTIONS
ATTENTION: Some clay projects may require adult supervision.
1. Prepare your work area
• Clay can be a messy activity!
• Use disposable paper to protect your work surface.
• It is helpful to use a small bucket of water for wetting your hands.
• Protect your clothing or wear clothing you don’t mind getting dirty before starting.
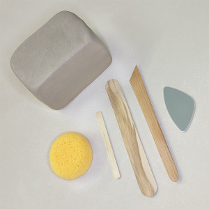
2. Plan your design
• Create some sketches of the shapes you want to create.
• It can be difficult to build clay up unless you start with a solid foundation. Tip: design a shape that will have its heaviest point near the ground or tabletop.
• Keep in mind that the amount of clay you have will reflect the final size of your artwork. Tip: design your artwork on a small scale.
• Plan to add texture and design to your clay surface after the shape is created. Tip: you may add details such as the stripes on a shirt using the tip of your wooden tool.
3. Prepare your clay
• Break off about 1-pound, or the size of your fist, to begin with.
• Cover unused clay with plastic to avoid drying out.
• Clay will dry out as you work with it.
4. For best results
• Your clay form can not be completely closed, you must poke a small hole or create an opening for air to escape. For example if you are making a hollow closed sphere you will need to poke a hole with a toothpick after the shape is made.
• Clay should not be thicker than 1 inch or thinner than ¼ inch. A consistent thickness will result in a more successful piece. Tip: create even pressure with the tips of your fingers when working with the clay.
• When attaching two separate pieces of clay, a rough surface must be made at the attachment points of both surfaces. Tip: add a tiny dab of water or clay slurry to the clay surface to help combine the two attachments.
• Compress and push the clay together when making attachments.
• Overworking your clay can cause cracking or drying-out. To prolong the work-ability of your clay, you can add water to the surface, but don't add too much water it will weaken the clay. Tip: use a spray water bottle.
5. Have fun playing and building with clay!
• Once your creation is finished you should allow the artwork to dry slowly. Tip: drape plastic over the artwork for a day.
• Please carve your initials on the bottom of your clay piece using a pencil or toothpick.
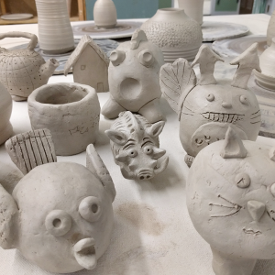
• If you have purchased glaze paints apply those to the surface at this stage.
• Clean up your work area and wash your hands when finished.
6. Return finished artwork to AA Clay Studio
• Finished artwork must be returned to AA Clay Studio to be kiln-fired so it becomes hard and permanent.
• Carefully package/cushion your clay creation for transport to the studio. It will be the most fragile in this stage.
• If you do not apply glaze paints (additional purchase) we will apply a white glaze to the finished artwork at the studio.
You must return clay-creations to the studio to be kiln-fired. The clay will become permanent after being fired. Kiln firing is included with Project Kits. *Do not add or apply any material to the clay or clay surface other than what we provide you with. Kiln fired pottery will be ready to pick up about 2-3 weeks after you drop off. Make sure you provide your name and contact info with drop-off items.
For easy transportation use the box provided to return your painted artwork to AA Clay Studio to be kiln fired.
© 2024 AA Clay - Ceramics Studio